Storyboard Tutorial – How to Create Storyboards for Film, Video, and Television
- Nov, 17 2010
- By Clay
- Illustration, Tutorials for Beginners
- 41 comments
First a Quick Note to Aspiring Producers and Film Makers
This tutorial is aimed at people who want to storyboard professionally. However it also useful for beginning television and film makers just wanting to know the basics. If this is you, then ignore all the parts about being able to draw. Crude stick figures will work just as good for hashing out your ideas pre-production. For you, the most important thing is just to storyboard the script. Now on to the tutorial.
Download Materials for this Tutorial
16:9 Eight Up Storyboard Thumbnail Sheet
16:9 Two Up Storyboard Template
16:9 One Up Storyboard Template
4:3 Four Up Storyboard Template (not true 4:3 but I used this one for years)
Animatic Layered Photoshop Storyboard Template
Storyboards Are Like Comics…Mostly
Just to get my street cred out-of-the-way, I’m a working professional storyboard artist. My client list includes The Discovery Channel, Animal Planet, Google, Intel, Oracle, and many lesser know but equally demanding companies. I know what they like and how to keep them happy.
However, this is not a tutorial on how to be hired as a storyboard artist or how to find a job at a studio. I’ve never formally applied for a storyboarding position, so I have no idea what it’s like to pursue employment in the traditional sense. Directors and producers just find me on the web, like what they see, and then hire me. The ones that don’t hire me find someone else and I’m never the wiser.
The most important thing you need to be a storyboard artist is the ability to draw. And I mean REALLY draw – as in anything and everything. If you can draw anime characters reasonably well but struggle with other styles or realism, then you’re not ready. If your people look good only from one angle or you try to avoid feet or hands because they always look funny, then you’re not ready. If your women look like guys with boobs, or the reverse, hypersexualized fantasy characters, then you’re not ready. If you can draw a fully armored, teeth clenched warrior blasting a crowd while leaping through the air, but you struggle to draw a pudgy middle-aged man-eating a bowl of cereal in his pajamas, then you are most definitely not ready.
With storyboarding you’re not there to express yourself, you job is to make the script come to life. This doesn’t mean you can’t have input on angles, transitions and shot compositions, it just means that no matter how much you’ll like to have the lead character in a bug spray commercial use a pair of chopsticks to grab a fly in mid-air, it’s not going to happen if it’s not in the script. The same is true for the car rental ad that’s begging for a high-speed chase scene or the customer service training video that just cries out for a fantasy sequence of an employee doing a flying roundhouse kick to a disgruntled customers head. If it’s not in the script, you can’t draw it.
Understanding How Movies and Television Work
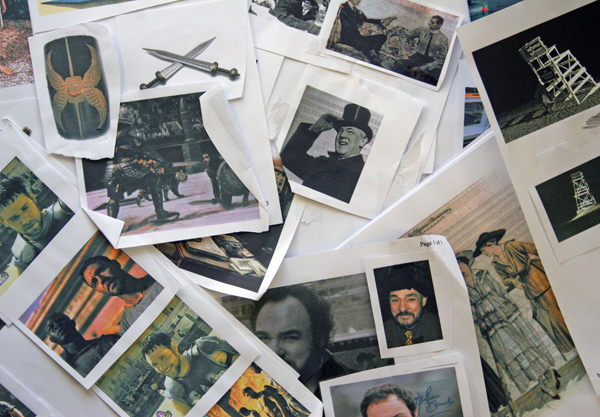
Now that you can draw you need to understand how stories are told in film and television. I’m not just talking about the language of cinematography and terms like wide shot, close up, extreme close up, pan, zoom, dolly, etc. I’m talking about how a story is told and the decisions that go into creating a solid narrative. If you’re the type of person that takes note of a cleverly framed shot or a great jump cut, if you sometimes find yourself analyzing how a scene was created rather than the scene itself, then you may be a good candidate for becoming a really strong storyboarder.
Punctual, Professional and Personable.
Now being able to draw and understanding the mechanics of great visual storytelling is just the foundation. You also need to be fast. You’re getting paid by the frame and the longer you take, the less money you make. Not only that, you won’t be afforded the luxury of time anyway. I don’t think I’ve ever been given more than a five day turn around once the script is in my hand. Sometimes it’s three days or even two.
Sometimes you’ll get a 9am emergency request for a couple more frames right before a presentation that afternoon. Sure, they could do the presentation without those additional frames, but it may make the difference between signing off on the script that day or three more weeks of meetings and pitches. If you are storyboarding for a production company or branding firm then the intended audience is their client and getting that script approved is of utmost importance. So yes, you’ll be dropping everything to knock out those additional frames.
One Size Does NOT Fit All
So now we’re going to assume that you can draw really well, you have an understanding of cinematic language, and you can meet deadline. The next part is style, and fortunately for artists, all styles are welcome in the world of storyboarding. That’s right, there is no “standard” look for a storyboard. Every director will have their own preferences and they will find a storyboard artist to match his or her own expectations.
Breaking Down the Script
Your client will provide a script. Usually it will be pretty tight. Sometimes it will include direction notes and a shot sequence. Whether it’s a traditional dialog script or one complete with a shot sequence, you will need to sit down with the producer and or director and walk through it.
This is where you talk about the intention of each scene, what are the most important parts, how many frames you’ll need, style, level of detail, format (16:9 or 4:3), what reference material is available, the look of the characters, and if this will be made into an animatic (ie. a simple animation that uses pans, zooms, and few key movements to drive the main story line). The animatic part is very important so ask up front. You don’t want to find out after the fact that they need the foreground and background on different layers or when the woman in the script pours a glass of juice they planned to actually have her pour it so they’ll need her arm on a different layer.
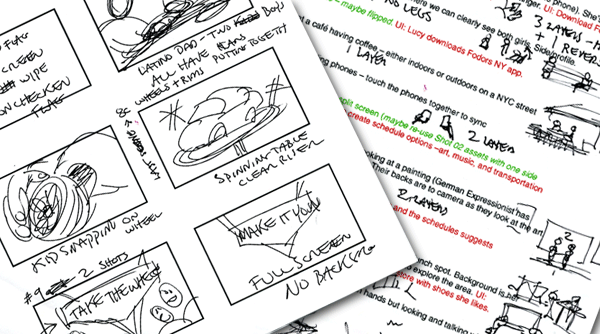
Now while you are reviewing the script with the director, make little notes on the script itself and have a thumbnail sheet handy to quickly block out the frames you’ll be boarding later.
Getting To Work
Once you have your notes, thumbnails, and source materials that were either provided to you or that you researched on the web, it’s time to start drawing.
How you go about this is up to you. Chances are you were hired because your portfolio matched the director’s sensibilities, so whatever you normally do to make a cool illustration, will be fine. If you are doing something different from your default style, then that was most likely defined in your earlier meeting and you’ll know what to do to meet that expectation as well.
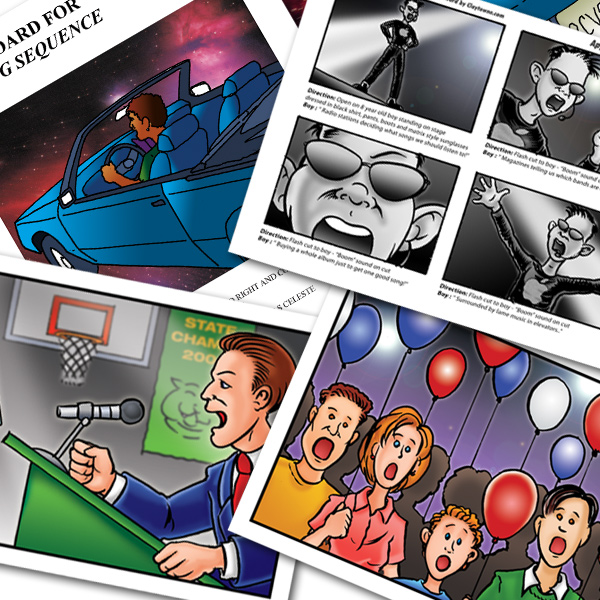
So here’s the rub. This is a tutorial, but like I said, there is no industry standard. Boards can be black and white, mono chromatic, or full color. They can be old school pencil on paper or new school digital paint. They can be sketchy or tight. Cartoony or realistic. Packed with shot notes, action lines and arrows, or drawn like movie stills.
So instead of telling you how you should do it, I’m going to show you how I do it.Whatever style or medium you work in, chances are it will be something similar as all artists pretty much have to follow the same basics.If you’ve never drawn a storyboard, then you can safely copy my work flow, style, and materials and be reasonably sure that you will not look like a fool when you present your final boards.
Download Materials for this Tutorial
16:9 Eight Up Storyboard Thumbnail Sheet
16:9 Two Up Storyboard Template
16:9 One Up Storyboard Template
4:3 Four Up Storyboard Template (not true 4:3 but I used this one for years)
Animatic Layered Photoshop Storyboard Template
Classic Black and White Pencil Storyboards
This is my favorite style. It’s clean – with no speech bubbles, action line or arrows – and has a timeless and artistically pleasing look.
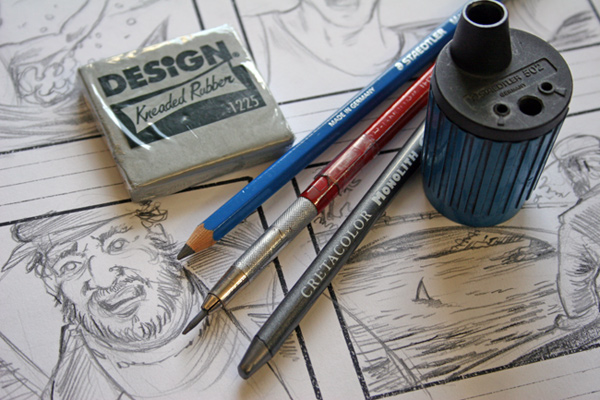
Materials: Technical pencil, preferably a Staedtler or Cretacolor, with 2mm or 4mm leads in the HB to 6B range, a kneaded eraser, a high quality lead or pencil sharpener, and whatever paper you like to draw on. I just use Staples brand recycled all purpose paper. After years of experimenting I’ve seen no advantage to using “artist” paper for storyboarding. You can also use any variety of artist pencils from wooden ones to the woodless Cretacolor Monolith where the whole pencil is a giant piece of lead. Go to a good art store and try them out. It’s really up to you so use what feels rights and gives you a good expressive line. You should also have a drafting board and a light table, but you can get by with any flat smooth drawing surface and a bright window for tracing. Or, you can mimic my setup and get the Futura glass drafting table and rig it up with a light bar and solve both problems at once. I’ve had a drafting board since I was twelve, so if an aspiring seventh grade artist felt it was a necessary item to practice their craft, then you should too.
1 – Lightly Sketching Out the Scene.
Use a harder lead in the HB range. Harder leads make lighter lines. Make sure you are drawing at the correct aspect ratio for the client’s needs. Most of the time I’m doing 16:9 these days. I have a stock template that fits two up on an 8 1/2″ by 11″ piece of paper. You can make your own or download my 16:9 storyboard template. It’s a good general template that works for most projects.
2 – Finishing Pencil Work.
Use a softer lead in the 2B, 4B or 6B range. Softer leads make darker lines and with less effort. Softer leads are also more expressive. It’s ok to overshoot the frame. You can leave them or trim them in Photoshop later.
3 – Scanning the Artwork.
Scan at grayscale at 300 dpi.
4 – Touch Up.
Open the file in Photoshop. If my pencils are plenty dark – but have lots of leftover sketch lines I want to eliminate – I bump up the contrast and brightness to drop out the leftover pencil lines I want to de-emphasize (Image>Adjustments>Brightness/Contrast). If my pencils are a bit too light I take down the brightness. Play around with the sliders until it looks right. Once you develop a consistent style you can save your favorite settings as a Photoshop action and run it on the whole batch at once. Save file as a PSD.
5 – Delivery.
Your client may want the PSD but most of the time they are happy with a high res JPG. Save your frames as JPG’s with a quality setting of 100%. Email or FTP to client. Make sure your file names make sense. They should look something like “Project_Script_Name_Frame_01.jpg”
Classic Ink or Marker Storyboards
This is a close second to classic pencil boards. Clean and crisp.
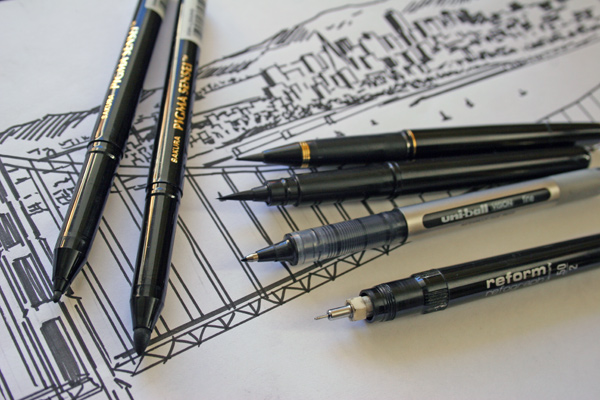
Materials: Technical pencil with HB lead, kneaded eraser, a lead sharpener, and whatever paper you like to draw on. I just use Staples brand recycled all-purpose paper. As for inking, it really comes down to personal preference. Some options include Manga pen sets, Sharpies, Kuretake Brush Pens, Pentel Pocket Brush Pens, Sakura Pigma Sensei markers, Faber-Castell manga and artist pens, Uniball pens, and Rapidograph technical pens. Go to a good art store and try them out. They won’t have everything but you’ll quickly get a feel of what you like. The most important thing is that it not bleed, it feels good, and you have a couple of line weights to choose from.
Old School Note: If you want to use markers for greyscale shading the old school way then use Letraset Promarkers and a good marker paper. However, you’ll still need to scan at 300 pdi and export as JPGS’s as everyone wants digital files these days.
1 – Lightly Sketching Out the Scene.
Use a harder lead in the HB range.
2 – Finishing Ink or Marker Work.
Lay down your ink or marker lines. If you overshoot the frame you can leave then or trim them in Photoshop later. Same with mistakes. Erase all the remaining pencil lines with your kneaded eraser.
3 – Scanning the Artwork.
Scan at black and white (Bitmap or Tiff) at 300 dpi.
4 – Touch Up.
You’ll probably see little “mistakes” all over once it’s scanned. How many you choose to leave depends on the look you are going for. If you’re going for a loose feel, then leave them. For a tighter feel you may want to clean up some stray lines with the lasso or eraser tool. If you prefer the eraser tool the file will need to be converted from bitmap to grayscale (Image>Mode>Grayscale)
5 – Delivery.
Your client may want the PSD but most of the time they are happy with a high res JPG. Save your frames as JPG’s with a quality setting of 100%. Email or FTP to client. Make sure your file names make sense. They should look something like “Project_Script_Name_Frame_01.jpg”
Color Storyboards
Nice and colorful but takes a lot longer than a black and white board. I charge about 50% more for color. It’s really important to decide ahead of time HOW you will color these. If you’re going to drop in color using the magic wand tool and the paint bucket or gradient tool, then your shapes better be closed. This means no “holes” in objects.
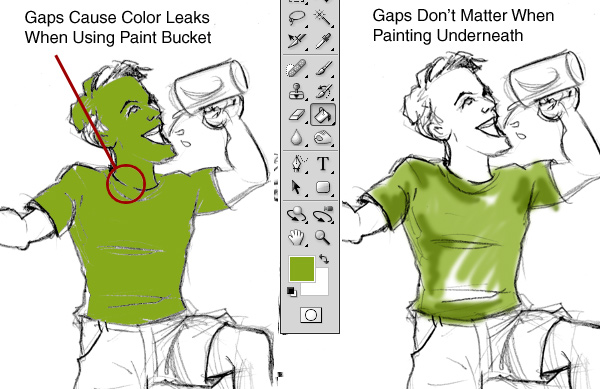
When dropping in color using magic want tool and paint bucket, gaps cause leaking. If you paint from behind by changing the layer from normal to multiply and then using the paintbrush tool to paint on another layer behind the drawing, gaps are not an issue.
Holes in objects that are supposed to be closed will cause the magic wand tool to leak. If you are going to color them digitally by either painting on top – or behind using the multiply effect on the pencil/pen layer – then the shapes can stay open.
Materials: Technical pencil with leads in the HB to 6B range, kneaded eraser, a lead sharpener, and whatever paper you like to draw on. I just use Staples brand recycled all-purpose paper. You may also need your favorite markers and pens if you’re doing an ink style line. If you don’t already own a Wacom tablet then this is the time to buy one. At a minimum get a Bamboo, but the Intuos is preferred. If you hem and haw at this purchase then you are not serious digital artist. Even my partner has one and she just does email and surfs the web!
Coloring Technical Note: It’s much more time consuming to color pencil drawings than to color ink/marker drawings. This is because with hard clean lines you have a lot of time saving options, in both Photoshop (with the magic wand and paint bucket tools) and in Illustrator (with the live paint tools – see my inking and coloring tutorial for Illustrator) to color efficiently. When you digitally color pencils, these tools don’t work as well, especially the magic wand tool. The look is less “painterly” in a colored ink drawing, but the speed gain is undeniable.
Old School Note: If you want to use markers for coloring the old school way then use Letraset Promarkers and a good marker paper. However, you’ll still need to scan at 300 pdi and export as JPGS’s as everyone wants digital files these days.
1 – Lightly Sketching Out the Scene.
Use a harder lead in the HB range.
2 – Finishing Pencil or Ink Work.
Use a softer lead in the 2B, 4B or 6B range. For ink or marker boards use what feels best. It’s ok to overshoot the frame. You can leave then or trim them in Photoshop later.
3 – Scanning the Artwork.
For pencil boards, scan at grayscale at 300 dpi, For ink/marker boards scan at black and white (BMP or TIFF) at 300 dpi.
4 – Touch Up.
Open the file in Photoshop. If my pencils are plenty dark – but have lots of leftover sketch lines I want to eliminate – I bump up the contrast and brightness to drop out the leftover pencil lines I want to de-emphasize (Image>Adjustments>Brightness/Contrast). If my pencils are a bit too light I take down the brightness. Play around with the sliders until it looks right. Once you develop a consistent style you can save your favorite settings as Photoshop action and run it on the whole batch at once. For ink scans you can cut away lines that bother you. If you are going to be dropping in your color then zoom in and close all the gaps! With a pencil scan, just sample the darkness you want and then use the brush tool with a diameter that matches the thickness of your hand drawn lines. Set the Opacity and Flow at about 75% and see how it feels. You don’t want it to lay down too much brush effect at once or it will look like a patch. With a marker or ink scan, I usually use the Lasso tool and make a shape that matches the existing lines and then fill it with black. You can also use the pencil tool. It’s up to you.
5 – Coloring.
Convert file to CMYK or RGB depending on your preference when coloring. I prefer working in CMYK if the final result will be printed. For coloring, you are probably going to use one of two methods. Paint on top/behind or dropping in color. I prefer to drop but it’s really a personal and stylistic choice. Dropping color is going to give you a harder, more pop art cartoony feel. Painting on top or behind is going to give you a softer, more painterly look.
6 – Delivery.
Your client may want the PSD but most of the time they are happy with a high res JPG. Save your frames as JPG’s with a quality setting of 100%. Email or FTP to client. Make sure your file names make sense. They should look something like “Project_Script_Name_Frame_01.jpg”
Mixed Presentation Storyboards
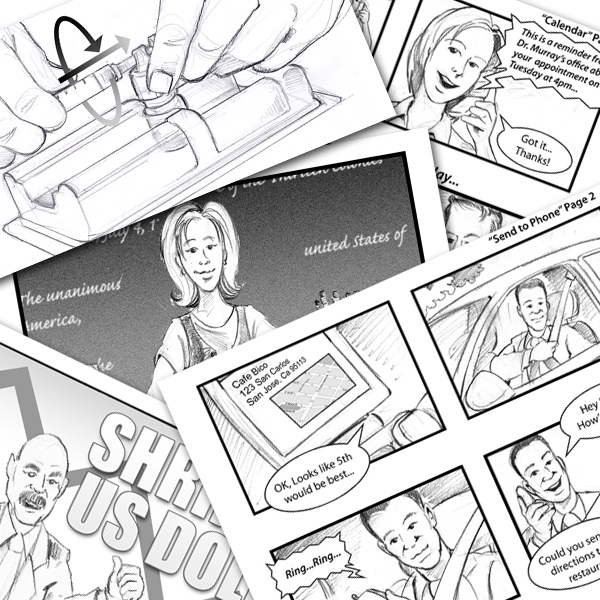
These boards can include speech bubbles, action lines, arrows, motion blurs, signage, cards, and cutaways. If you are using these techniques, then you probably have a very specific audience in mind. Perhaps it’s a product demonstration that requires a more scientific or a step by step approach. Maybe it’s a board to be presented to a focus group and it needs to read like a comic book. Or maybe it’s for the DP or cinematographer and they need lots of shot direction.
Materials: Technical or artist drawing pencils with leads in the HB to 6B range, kneaded eraser, a lead or pencil sharpener, and whatever paper you like to draw on. I just use Staples brand recycled all-purpose paper. As for inking, it really comes down to personal preference. Some options include Manga pen sets, Sharpies, Kuretake Brush Pens, Pentel Pocket Brush Pens, Sakura Pigma Sensei markers, and Rapidographs technical pens. The most important thing is that it not bleed, it feels good, and you have a couple of line weights to choose from.
1 – Sketching Out the Scene.
Use a harder lead in the HB range. If these boards are going to have speech bubbles, arrows, split screens, cutaways or any other effects make sure to accommodate for then now or draw them in. The last think you’ll want to do it try to sneak in a speech bubble after the fact because you forgot to compose for one.
2 – Finishing Pencil Work or Inking.
Use a softer lead in the 2B, 4B or 6B range. If your inking, then ink now. It’s ok to overshoot the frame. You can leave then or trim them in Photoshop later.
3 – Scanning the Artwork.
For pencil boards, scan at grayscale at 300 dpi, For ink/marker boards scan at black and white (BMP or TIFF) at 300 dpi.
4 – Touch Up.
Open the file in Photoshop. If my pencils are plenty dark – but have lots of leftover sketch lines I want to eliminate – I bump up the contrast and brightness to drop out the leftover pencil lines I want to de-emphasize (Image>Adjustments>Brightness/Contrast). If my pencils are a bit too light I take down the brightness. Play around with the sliders until it looks right. Once you develop a consistent style you can save your favorite settings as a Photoshop action and run it on the whole batch at once. Now it’s time to put in the speech bubbles, arrows, signage, titles or any other elements that you intentionally left out, but composed for, because they are best done in Photoshop. I always do speech bubbles and most signage/cards in Photoshop but other effects are decided on a case by case basis.
5 – Delivery.
Your client may want the PSD but most of the time they are happy with a high res JPG. Save your frames as JPG’s with a quality setting of 100%. Email or FTP to client. Make sure your file names make sense. They should look something like “Project_Script_Name_Frame_01.jpg”
Storyboards for Animatics
These can be in pencil or ink, black and white, or colored. What separates these from the classic boards is you must compose in layers. This is time consuming but it’s great fun to watch the finished piece.
Materials: Whatever materials you like but I highly recommend a light table at this stage in the game. Every artists should have one but for this it’s a must or you’ll be getting up and running to a bright window every five minutes. This is not about a specific style, but a specific way of drawing and preparing your storyboards.When I’m going to be making boards for animatics I generally use my one up 16:9 storyboard template but I don’t draw on the template itself. I put it under my paper to act as a guide for dimensions. The reason being is that when you storyboard for animatics, you’ll want to draw bigger than usual and over shoot the templates boundaries. This will give the editor some wiggle room for pans, zooms, and pull outs. You’ll also be using several sheets of paper and doing a lot of tracing to make all the individual parts that need to be animated.
1 – Sketching Out the Scene.
This step is to block out the scene and make mental notes about what needs to be separated.
2 – Drawing Each Layer.
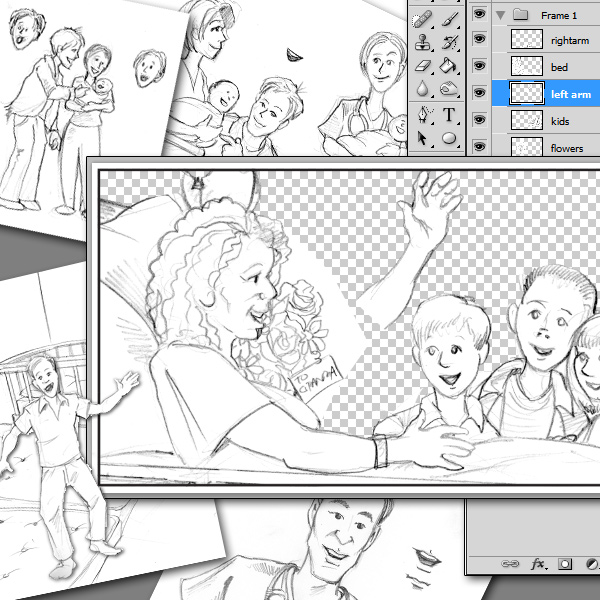
This is where a light table comes in handy. Your master scene sketch will provide the guide to draw each individual part. You’ll probably use several sheets of paper. A typical scene breakdown might include a master background layer, a master character layer with the action arm missing, and other layer or two for the action arm, and maybe a foreground element.
3 – Scanning the Artwork.
Scan at grayscale or color (for pencil) or black and white bitmap or Tiff ( for ink or marker) at 300 dpi.
4 – Touch Up.
With animatic boards you’ll be building the scene out of parts. So first you’ll create a master Photoshop template. You can download my complete layered Photoshop storyboard template featuring a Roman gladiator on his way back from grocery shopping getting mugged by a dinosaur with a tommy gun to see how it’s done. Move the parts around to simulate action. This template includes a frame for demonstration purposes but you could design yours without a frame and let the scene bleed to the edges. It’s this template that will be the final scene.
Open up all the scans for your parts. Do any touch ups on these now. Then cut and drag over the parts. I usually start with the master background layer. Name the layer “background”. Don’t size it down to make it fit. It’s good that it bleeds off the frame. The whole point is to give the editor as much flexibility as possible, so the bigger (within reason) the better. Drag all the parts over, name the layers correctly (eg. left hand should be named “left hand”) and shuffle the layers into the proper order. The animation department will want RGB files so work in that color space. Save the file.
5 – Delivery.
Your client will want the layered PSD so don’t flatten them. Make sure your file names make sense. They should look something like “Project_Script_Name_Frame_01.psd”. Email or FTP to your client.
View My Discovery Channel Storyboards Converted to Animatics
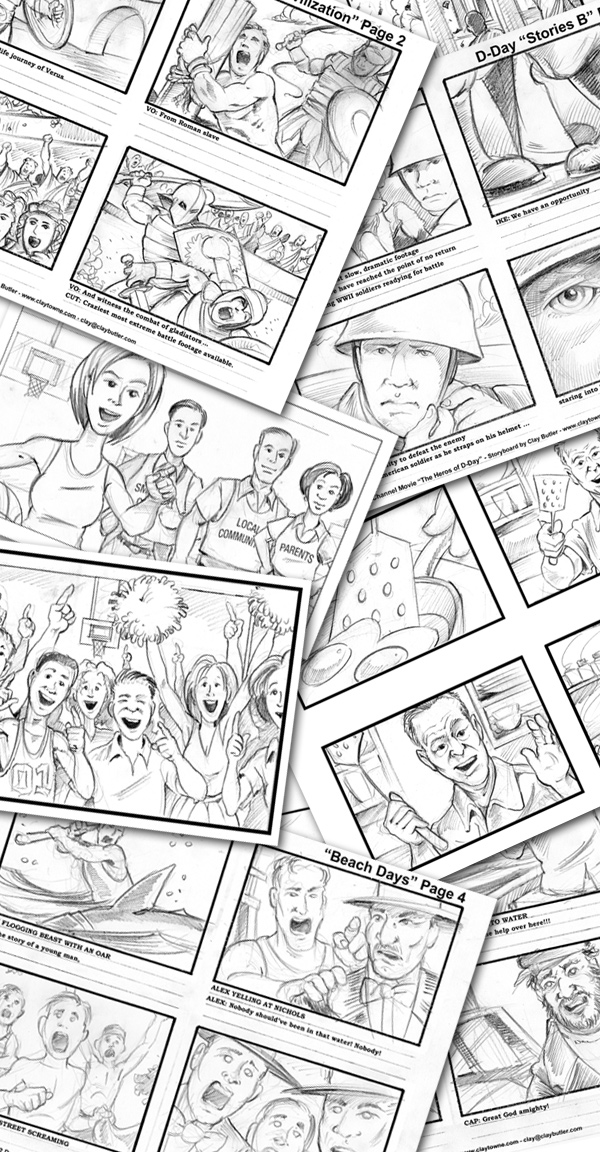
These were done in the classic pencil board style but later their amazing production department converted them to these very cool animatics. There is a lot you can do with pans, zoom, shakes and some very good voice over and sound effects.
12 Days of Terror – Original Discovery Channel Movie
View “Beach Days” Pre Production Animatic
View “Myths”Pre Production Animatic
View the Original Movie Trailer
Colosseum – Original Discovery Channel Movie
View “Civilization” Pre Production Animatic
View “Journey” Pre Production Animatic
View “Verus” Pre Production Animatic
Days of Courage – Original Discovery Channel Movie
View “Ike” Pre Production Animatic
View “Stories” Pre Production Animatic
View “Spies” Pre Production Animatic
Conclusion
So that’s it. That’s how a pro – or at least this particular pro – does it. How you do it is up to you. However, if you don’t have any methods of your own yet, you’ll greatly increase your chances of pulling off a successful storyboard project by following mine. But the true test is if directors keep rehiring you. If you keep getting work then whatever you are doing is the “right way”.
Want to hire a storyboard artist? Then call me (Clay Butler) at 831-566-3046 or try Email
File Under: Learn How a Professional Storyboard Artist Works. Learn What Pencils, Pens, Paper and Art Supplies are Best for Storyboarding. Lessons on Drawing Black and White, Color, and Animatics Storyboards. How to Draw Storyboards.




Rob Chevalier
Clay, that was quite possibly your best tutorial yet.
Clay (The BDD Dude)
Thanks. Most of the storyboard tutorials out there are really weird so I decided to make one that gave it to you straight instead of wasting time telling you how to shade with a pencil. If someone needs a tutorial on just how to draw basic stuff, they’re definitely not ready to storyboard. So this tutorial assumes you can draw already and you really just want specific guidelines for producing professional boards.
Cameron Scott
Your webpage is by far the most helpful and practical info on storyboarding I have read. Thanks Dude! Awesome man!
Clay (The BDD Dude)
You’re welcome.I’m going to be posting a set of high resolution samples of boards so people can see finished real production boards up close.
Diego de Paula Antunes
Hi there.
This is a really great page!
I just got a storyboarding gig for a scene in a feature film and I’m feeling a little out of my league.
Your tutorial was a very practical and lucid way to lay it all down.
I was in desperate need of some good, old, solid advice, with specific technical hints like those.
Thank a bunch!
Clay Butler
Thanks. I know the feeling too. No matter how solid your raw talent is, your first gig is still your first gig.
Ashley
Clay, I am currently an art student at Florida State University and I am in the process of figuring out how to make an animatic. I really just want to thank you because I have gotten several books from the library, done SO much online research and this page has been the only thing that makes me feel a lot better about my chances of accomplishing what it is I plan to take on. Thanks again for taking the time to put this out there.
Clay Butler
You’re welcome. They aren’t that complicated if you create your assets for easy editing.
Kjaer
Thanks, Clay, this is about as in-depth a guide as they come. You’ve even included the tools (and the brands!) and those little tips on how to get and keep business—very helpful and encouraging for somebody starting from scratch.
Now I’m not a storyboarder—yeah, my hands and feet sketches always look funny, haha. But I do find it interesting to see how those commercial shots are planned.
What I’m itching to see now, though, is one of the final products juxtaposed with the storyboard. Now that’s really interesting. I don’t know if there’s anything like that in one of the HTML animatics you’ve included links to. I’ve tried downloading them, but they are taking forever from here. *sigh* But I’ll try again later, when there are (hopefully) less users, and maybe it’ll load by then. I am crossing my fingers!
Clay (The BDD Dude)
You just missed one the links to view the animatics.
This link View the Original Movie Trailer will take you to the final Discovery Channel promo for 12 Days of Terror. Go through my portfolio here http://39a48274f3.nxcli.io/ct_gallery_ill_storyboard.html to see the boards for the movie trailers. I pretty much nailed it.
Shortly I’m going to post some high resolution images of some of my favorite storyboard with case studies for those that really want to go deeper.
Just wait for the animatics to play. They’re flash files that will open up into a new window.
jerome Lukas
EXCELLENT! Very kind and generous of you to share this wealth of information, creativity and practical step-by-step procedures!
Jerome Lukas
Lorenzo
Hello and thank you for making this helpful page.
I use a mac and I’d like to ask you if you can suggest a software to create an animatic. I have a storyboard about a videoclip that i did years ago and I’m stuck on imovie.
Thanks
Ava M. Shelby
Unfortunately, I am not an artist but have an idea for a televison show and want to create storyboards to tell the story. I enjoyed reading your tutorial but lack the ability to draw the vision I have in my head. Please advise as to next steps. (Also you omitted a word under, “Story Board are like Comics” beginning with the second paragraph that starts with the word “However”. It should read…how to find…rather than….how find).
stacy davidson
I did not learn anything. But thanks Clay!
Mari
This is my new favorite tutorial blog! Thank you for sharing Clay!
David Theyn
Thanks for spending your time to make this tutorial, it is very helpful. Two of my friends and I are in the planning stages of making a film and I was researching all of the areas of production that would suit me best. As an artist the storyboards would fall under my one of my tasks at least in the beginning stages. I have written many scenes and really wanted to be able to show visually what I wanted the scene to look like, I just need some guidance on how to format it. Your tutorial explained it all so well. Thanks again
Jagtar Singh
thank you for making this helpful page and Thank you for sharing Clay!
asdf
Hey, I’m a high school senior making a storyboard for a short film and I just wanted to thank you for the information.
Brittany
Thanks for the info, I’m still in highschool though and already have a story made that i hope people can watch and read someday, but question, even if you have your characters made and stuff and dont believe youre ready yet like how can you find someone that will help you create it? Got any clues? I’m make an opening for it and having trouble with it.
Mark Sowders
AWESOME … having done all forms of advertising for the past 18 years, I was impressed with your clean and professional approach.
I’ve recently branched off with my own marketing firm (only a month in, yet have 8 clients so far; building the basic foundation currently in aligning myself with dedicated, talented, trustworthy “talent.”)
How much would a “car commercial” (small dealership) run for :30 spot?
We want to have 3 commercials for the community and then video promoting their proprietary franchise system.
I hope to work with you.
max preston
wow those are some f****** awesome pics
mahsa
i am in first step for make animation whit my own and with nice story. tnx for ur info
hannah
we are in a project in computer beacau we are here to learn how to make or how create a movie or a story and a comics…..:)tnx for helping….:)
chris
thanks!!!!!….great stuff…..very inspiring!….
AHMED
thank you for making this helpful page and Thank you for sharing Clay!
Martlaw
Thanks Clay. This is very helpful stuff. God bless you
Charmian Webster
Hi Clay
I’m always amazed by the generosity of folks like you who are happy to share their knowledge. A million thanks for that. I’m just starting out and found your site most informative and useful.
I’m nowhere near ready – but you’ve given an excellent overview of what’s needed to be a good storyboard artist.
Many thanks again
Susan Katz
Hi Clay:
Thanks for this — I’m going to be sharing this with a class I teach n Advertising Copywriting at the University of Bridgeport….very nicely done!
Susan
Melissa Schultz
Thank you for the tutorial. Helped me a lot. Great work.
Jay Max
A good tutorial, helped a lot, thanks man.
Fayon Gonzales
Thanks for the information it was really helpful.
John Bean
I am an e-learning developer and I do very basic storyboarding for my curriculum. Your blog is a fantastic example of all that is great about the internet and our ability to use it for communication and education. Well done!!
John
Ritz
Im excited to have found this. I storyboard so quickly when im working on a project I dont take time for specifics. You shed some light into the last piece i did. Im going to look at my boarding so differently now! Take those extra few seconds to draw fingers properly!
Paul
I just wanted to say THANK YOU.
Tara
Fingers are soooo difficult! I have the hardest time with that and feet too.
Ever Ballpoint
Awesome tutorial! Thank you for some relative advice on what materials you use for different types of boards. I ventured into graphic designer territory and was overwhelmed with circumstantial suggestions. But you are straight up with no ifs and buts, just professional simple techniques. Thanks for spreading the know-how.
Cathy C
I commented on your YouTube site, but I don’t mind repeating…all I can say is WOW! You have made it seem so easy. Of course, you are a very talented artist and some of us could use an art class, or two, to illustrate the way you do. However, your Storyboard Tutorial was so informative and motivating, you made me feel that I can do it. This is a gift you have and I wish you much more success.
Kevan Manwaring
Cheers Clay!
Very useful – will share with my students. Many thanks.
George N
Thank you Clay for this tutorial!
Joel Savell
Hey, what’s up Clay! This is Joel, the redheaded guy from Sewer Peak. I stumbled upon this very informative tutorial and only after reading it did I really that it’s you! Well done, see you in the water one of these days.
johnny argent
great stuff, Clay.. I followed a trail here from one of your cartoons someone had posted on twitter (the fat, suited beggars from the MIC, etc. on the sidewalk) …Just curious
if you play around with Procreate software on an iPad or whatever? Anyway, you’re busy – but I just wanted to take a minute to complement your work & skills..